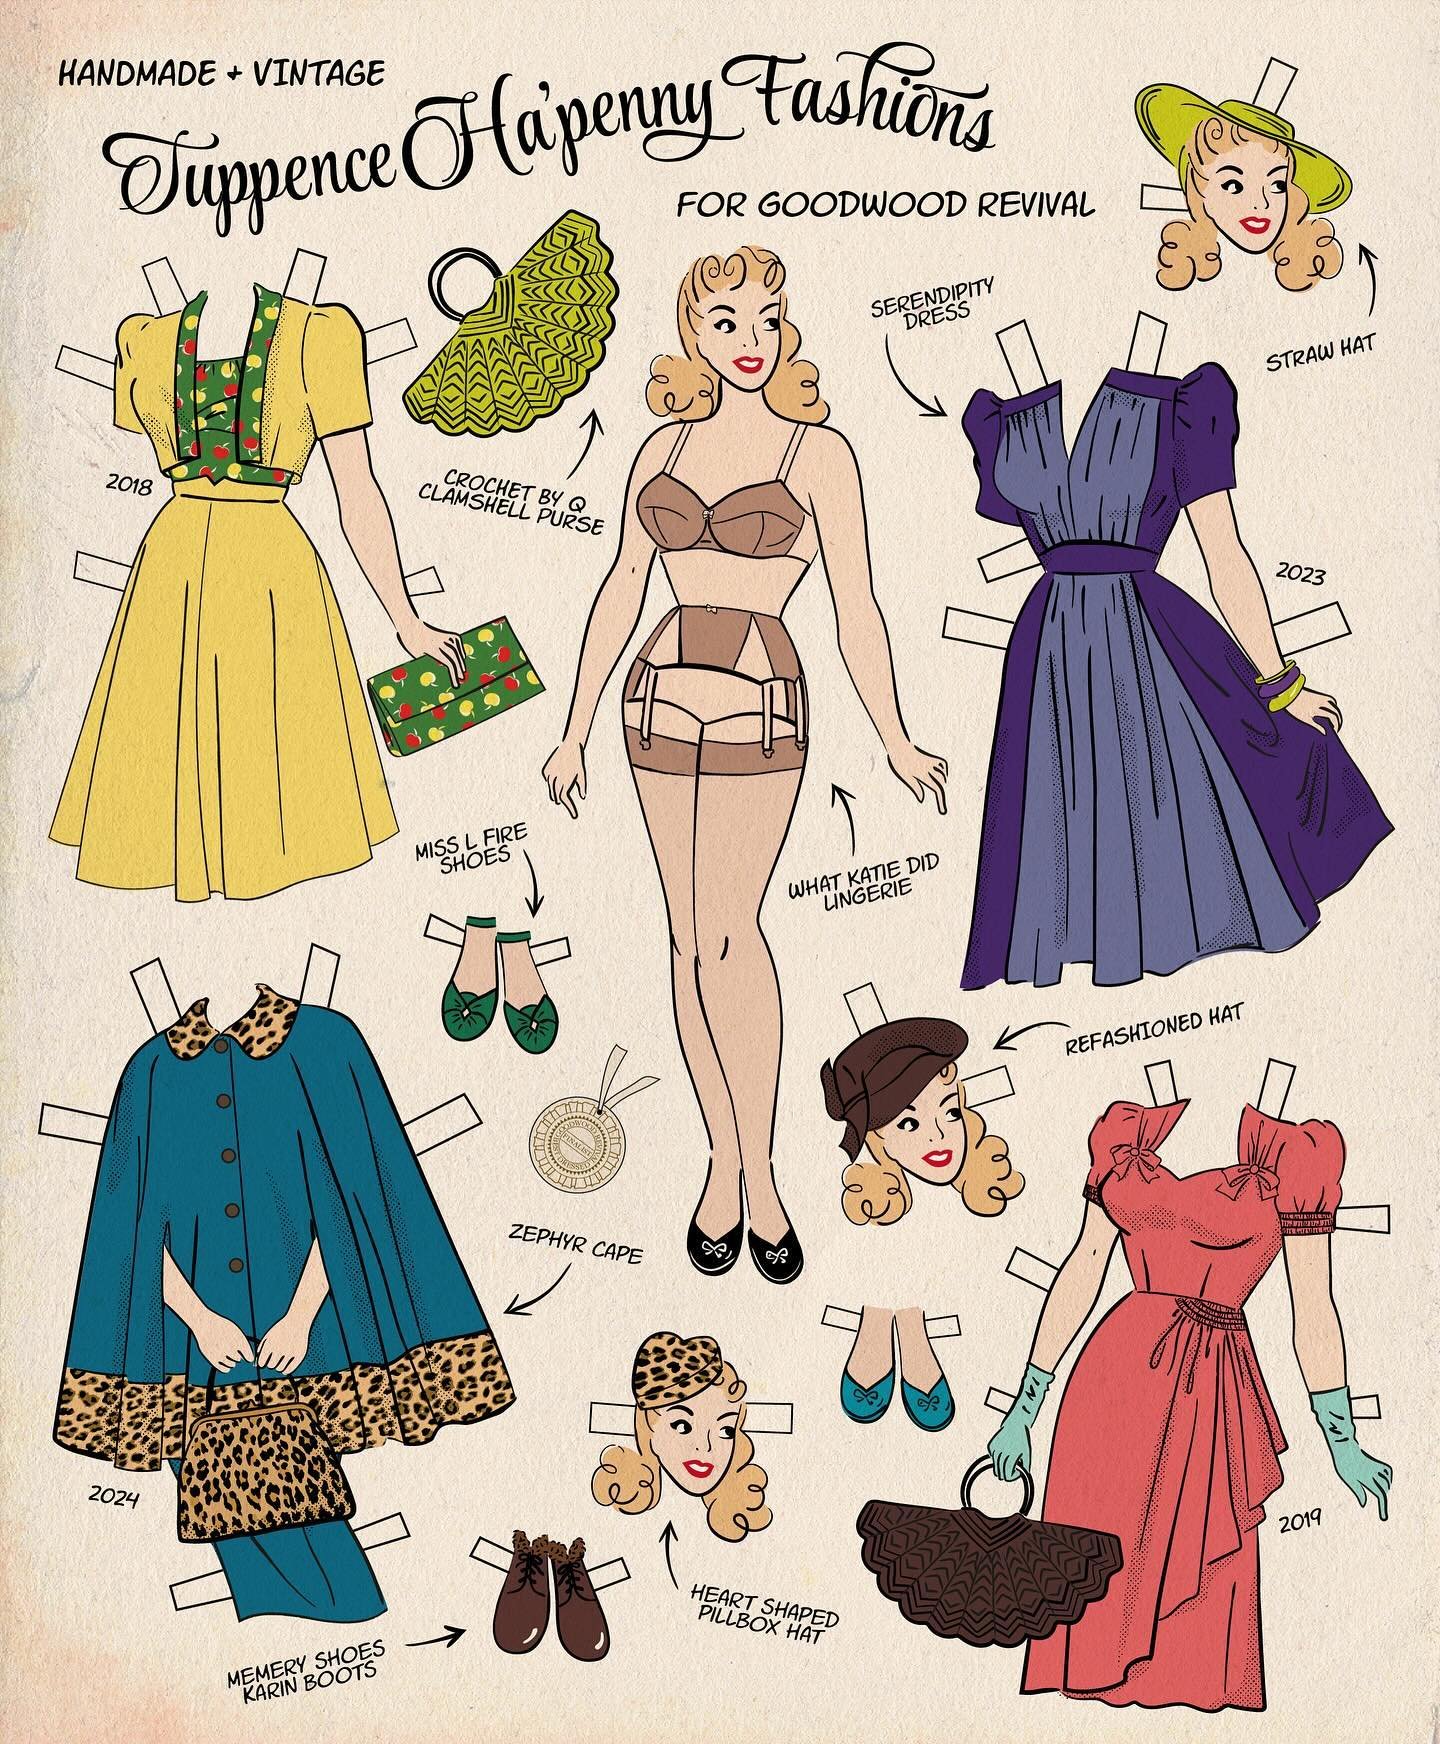
It’s no secret that I’m a massive fan of the boat-neck bodice pattern from Gertie’s Ultimate Dress Book - I’ve made several adjustments for a perfect fit, and it’s incredibly flattering to my figure, plus it comes together painlessly and relatively quickly. I've made six (!) versions of it including my recent Perfect Match dress but for several of these I made design changes to the original pattern. The changes ranged from simple (converting the neckline to a V-neck or drafting cuffs for the sleeves) to more complex alterations such as redesigning the midriff piece to create this ‘crossover’ or faux-wrap effect. These types of pattern hacks are actually easier than you might think, so I thought I’d share the steps of how I did it. These instructions can be used with any similar pattern which has a fitted midriff; the GUDB pattern works particularly well because the midriff piece grades up at the sides ever so slightly, so it lends itself to this alteration.
Start by tracing your pattern pieces: front midriff and front upper bodice. The front midriff piece is cut on the fold, but we need the entire shape to work on (since the finished midriff will be formed of two asymmetrical pattern pieces), so either trace it on the fold or trace, flip, trace again. The look I was going for involves dipping the midriff piece slightly in a V-shape in the centre, meaning the upper bodice piece would then have to take up the extra fabric to fill the gap, so make sure to leave a good margin of tissue along the bottom edge when you trace, to save having to tape on an extension.
Having traced the pattern pieces, you’ll need to draw in the seam line, ⅝” from the edges (remember to draw the seam right up to the fold). Always work directly with the actual seam lines when making pattern adjustments or alterations, to ensure accuracy. I like to do dashed lines so it’s easy to tell at a glance which lines I’m working with.
Now the fun part: designing the new shape. I went through several iterations and several bodice muslins while I figured out the best way to shape the new midriff, and finally settled on a fairly small adjustment. I drew in the new seam lines in red, just dipping the centre front about 1” in a V-shape. I extended the downward stroke of the V on the right-hand piece (on the left as you look at it) to slope gently down to the waistline.
Having mapped out all the new seam lines, you can now add the seam allowances back in. Using a new colour, draw the new cutting lines ⅝” from your seam lines.
Your upper bodice piece is now good to go, but the two new midriff pieces need to be re-traced on a fresh piece of tissue, following the new cutting lines. Mark a notch on the right-hand midriff piece at the centre line - this will help with lining up the pieces when you come to sew.
The upper bodice piece now needs a small extension at the lower edge to match the notch which we’ve taken out of the midriff front. Since there’s a few inches at centre front which are not gathered, this is as simple as laying the upper bodice over the midriff front, lining up the old seam lines, and tracing the new line.
Note: when I made this up in a striped fabric, I cut the midriff sections on the bias so the stripes would run parallel to the diagonal ‘crossover’ seam. I did the same with the back midriff pieces, so they form a ‘V’ at centre back, and the stripes match at the side seams.
When you assemble the bodice front, attach the left-hand midriff piece to the upper bodice first, then you can attach the right-hand piece with a nice smooth seam without having to worry about matching corners. Having done this, just proceed as per the instructions in the book.